The Marsh 241D coder is designed to be a low maintenance coder with moving parts protected to prevent ingress and contamination. Moving parts are lubricated using grease during assembly ensuring smooth operation during the lifetime of the M241D.
In a small number of situations, contamination can still occur with very fine dust particles or accidental product spillages causing the movement of these moving parts to become restricted and impacting the M241D print performance.
Indications of contamination of slide assembly or drive gear:
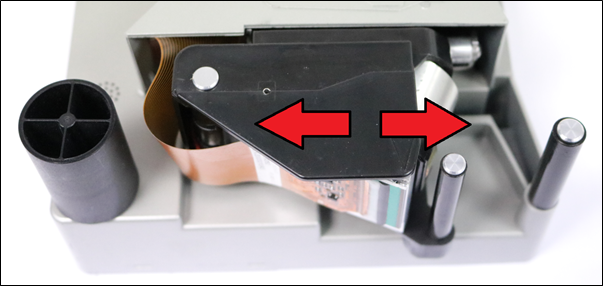
a. Restricted ‘printhead assembly’ movement – The printhead assembly travel is restricted or does not move smoothly when printing. In operation, the printhead assembly might not move the same distance for each print or may be erratic.
- On inspection, the printhead assembly movement feels stiff to move and does not feel smooth or unrestricted (should be able to move by gravity).
- NOTE: This check should be completed when the host machine and M241D are powered off to prevent injury or damage to equipment.
b. Print defects – The printed image appears to be squashed or inconsistent in height throughout the print. The negative image of the ribbon should show the stretched or compressed image – not just on the packaging material. See examples images below:
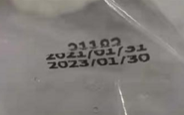


- NOTE: Similar print detects are caused by the packaging material moving at the same time as the M241D attempting to print. Please make sure you check this before attempting this maintenance. Please refer to Common Print Defects and Corrective Actions.
Images of contaminated slide rail (Reference):

In the event, your M241D coder experiences the issue discussed above, below are instructions for cleaning and regreasing the moving components.
Process for cleaning and reapplying grease to slide rail and drive gear mechanism:
- Power off the host packaging machine and Marsh 241D coder.
- Disconnect the power cable and I/O cable from the M241D coder.
- Remove the M241D from the mounting bracket and place it on a secure, flat surface. The front of the coder (where the ribbon is mounted) should be facing up.
- Carefully remove any ribbon fitted to the M241D.
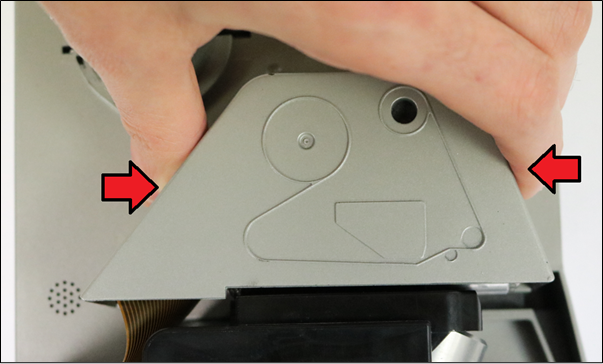
- Locate the front cover protecting the moving mechanics. Squeeze the two sides of the cover to release the latches and pull up vertically away from the M241D. (Shown below).
- Removing the cover will show the slide rail which allows supported movement of the printhead when printing. Also, the main drive gear and rack that moves the printhead assembly. (Shown below).
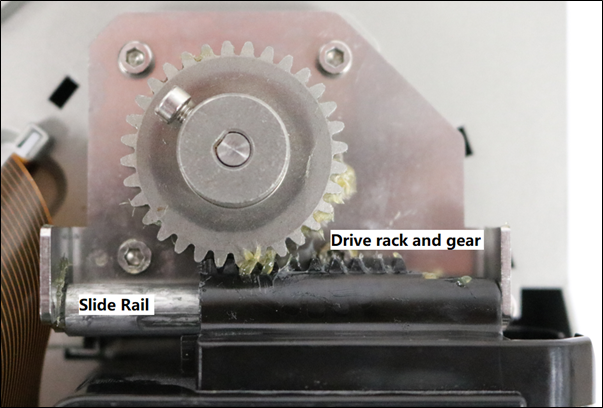
- Manually slide the printhead assembly and carriage to the end of the stroke. Use a clean cloth or paper towel to wipe the exposed area of the slide rail clear of any contaminate. Slide the assembly to the opposite end of the stroke and repeat the cleaning process. Complete this process several times ensuring all contaminate has been removed.
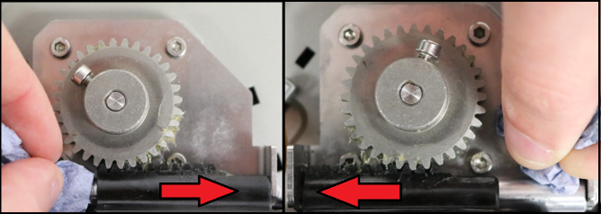
- Manually slide the printhead assembly and carriage to the end of the stroke. Use a clean cloth or paper towel to wipe the exposed area of the drive gear and drive rack clear of any contamination. Slide the assembly to the opposite end of the stroke and repeat the cleaning process. Ensure the gear profile is clear of any debris which could impact how the parts interact.
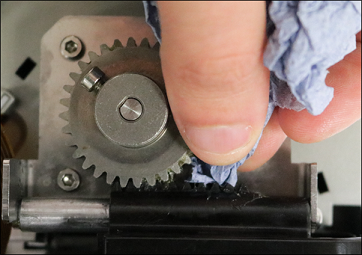
- Once the slide rail and drive rack are clean you can reapply lubrication in the form of grease. As per the cleaning process, move the printhead assembly to the end of the stroke. Apply a small amount of grease on the exposed area of the slide rail (try to spread it evenly around the rail without too much excess). Additionally, place some grease on the exposed area of the drive rack and drive gear. Slide the assembly to the opposite end of the stroke and repeat the grease application process.
Finally, using your hand - move the carriage position end to end to allow the grease to be spread between all teeth and the entire slide rail.
- Check carriage movement feels smooth and the entire length of the stroke.
- Replace the gear cover by interlocking the clips back into the baseplate.
- Replace any removed ribbon.
- Remount in the bracket using the gap setting tool.
- Replace cables.
- Complete.
Using Oil will invalidate the M241D warranty should it cause failure to the M241D.

